


Harumasa
SAsaba Harumasa
 Electric
 Attack
 Pierce
 Slash
Slash Hollow Special Operations Section 6
Best Harumasa Build Guide
Written by Phạm Ngọc Bảo Châu ·
Playstyle Overview
Harumasa is a free Electric Attack DPS. His main damage comes from Dash Attack: Hiten no Tsuru - Slash. His 5th Basic Attack hit, EX Special Attack and Chain Attack create Electro Quivers; when Falling Feather hits, the quivers fire and stack Electro Prison. At 2+ stacks the target becomes X-Marked, putting him into Awakened state so he can dash-slash repeatedly, each slash consuming 2 stacks.
His Additional Ability (needs a Stun or Anomaly teammate) adds 40% DMG against Stunned or Anomaly-afflicted enemies. Build ATK and CRIT, keeping CRIT Rate at no more than 75%. He is flexible in team building and has a very high skill ceiling, but he's demanding to play and you need to plan your route.
Best W-Engines
 S1
S1ATK 713 · CRIT DMG 48%
Growth Through Adversity ›
CRIT Rate increases by 10%. Dash Attack Electric DMG increases by 40%. When any squad member applies an Attribute Anomaly or Stuns an enemy, the equipper's CRIT Rate increases by an additional 10% for 15s.
*Stats shown are at Base level.
 S1
S1ATK 713 · CRIT Rate 24%
Sprouting Core ›
Increases CRIT Rate by 15%. When the equipper deals DMG with a Basic Attack or EX Special Attack, they gain 1 stack of a buff. Each stack increases the equipper's Electric DMG by 12.5% up to 2 stacks. Each stack lasts 40s. The duration of each stack is calculated separately.
Can trigger once per use of a skill. At 2 stacks, the wearer's Basic Attack and Ultimate DMG ignore 20% of enemy DEF.
*Stats shown are at Base level.
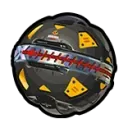 S1
S1ATK 684 · ATK% 30%
Scorching Breath ›
Upon hitting an enemy with a Basic Attack, Dash Attack, or Dodge Counter, the equipper's ATK increases by 3.5% for 8s, stacking up to 8 times. This effect can trigger once every 0.5s. The duration of each stack is calculated separately.
*Stats shown are at Base level.
 S1
S1ATK 713 · CRIT Rate 24%
String & Melody ›
CRIT DMG increases by 50%. When the equipper enters the battlefield, or activates a Chain Attack or Ultimate, they gain 1 stack of Heartstring. Each stack of Heartstring allows the equipper's Chain Attack and Ultimate to ignore 12.5% of the target's Fire RES, stacking up to 2 times and lasting 30s. Repeated triggers reset the duration.
*Stats shown are at Base level.
 S1
S1ATK 713 · CRIT DMG 48%
Tranquil Blossom ›
CRIT DMG is increased by 30%. When the equipper lands a hit with a Basic Attack, Special Attack, or Aftershock, they gain 1 stack of a buff. Each stack increases the equipper's CRIT DMG by an additional 10%, stacking up to 3 times. The effect lasts for 30s, with each stack's duration calculated separately, and can only be triggered once per use of a skill. With all 3 stacks, the equipper's Electric DMG increases by 20%.
*Stats shown are at Base level.
 S5
S5ATK 594 · ATK% 25%
Knight Plummel ›
Launching an Assist Attack increases the equipper's ATK by 12% for 12s.
*Stats shown are at Base level.
Best Drive Discs
 4
44-pc ›
Electric DMG +10%
As long as an enemy in combat is Shocked, the equipper's ATK is increased by 28%.
 2
22-pc ›
ATK +10%
 4
44-pc ›
The DMG of Aftershocks and Dash Attacks is increased by 15%.
Upon hitting an enemy with an Aftershock or Dash Attack, if the DMG dealt aligns with the equipper's attribute, the equipper gains 1 stack of a buff effect, at most once per use of a skill. For each stack, the equipper's ATK increases by 4%, and CRIT Rate increases by 4%. The effect can stack up to 3 times and lasts for 15s. Repeated triggers reset the duration.
 2
22-pc ›
CRIT DMG +16%
 4
44-pc ›
CRIT Rate +8%
Landing a critical hit on an enemy with a Basic Attack, Dodge Counter, or EX Special Attack increases the equipper's ATK by 9% for 6s. The buff duration for different skills are calculated separately.
22-pc ›
The DMG of Aftershocks and Dash Attacks is increased by 15%.
Best Main Stats
- Disc 4ATK% (or CRIT Rate / CRIT DMG depending on what your CRIT needs)
- Disc 5ATK% / Electric DMG
- Disc 6ATK%
Best Sub Stats
- 1CRIT Rate (up to about 75% on the stat screen)
- 2ATK%
- 3CRIT DMG
- 4PEN
- 5Flat ATK
Endgame Stats
- ATK
- 2600 – 3400+
- CRIT Rate
- 75% (not more)
- CRIT DMG
- 150 – 190%
- HP
- 10000+
- DEF
- 800+
Keep CRIT Rate around 75% on the stat screen and no higher, because his Core Passive already adds extra CRIT Rate to his Slash. Harumasa tends to be saturated on other stats, so ATK is the most valuable stat after that; watch out for overcapping CRIT with Cordis Germina or CRIT Rate buffers like Nicole.
Skill Priority
 Core Skill
- ›
 Dodge
Dodge - ›
 Chain Attack
 - ›
 Special Attack
 - ›
 Basic Attack
 - ›
 Assist
Level his Core Skill first for the CRIT Rate and CRIT DMG on Hiten no Tsuru - Slash, then Dodge, since his Awakened Dash Attack is his main damage. Chain Attack/Ultimate and Special Attack are used often in combos and also create quivers. Basic Attack is mainly for generating quivers, and Assist comes last.
Best Teams for Harumasa
Most Used Teams Right Now






Generalist Team

Electric Teams



F2P Team



Best Bangboo for Harumasa

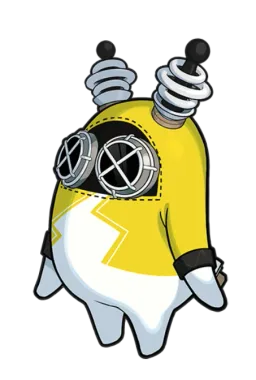



Plugboo is the main pick and works best with at least 2 Electric Agents (Grace, Rina, Qingyi, Trigger…) so its Bangboo Chain Attack builds a lot of Electric Anomaly; Electroboo is the alternative with the same requirement.
In the F2P team with Anby and Nicole, use Electroboo; Bagboo (needs an Attack Agent), Booressure (needs a Support) and Sumoboo (needs a Stunner) also work.
Skills
Basic Attack: Cloud Piercer
Press Basic to activate:
Launch up to five piercing attacks ahead, dealing Physical DMG and Electric DMG.
When the 5th hit of the Basic Attack hits an enemy, it generates 2 Electro Quivers.
After activating a Chain Attack, the next time Harumasa activates the 5th hit of Basic Attack: Cloud Piercer and hits an enemy with it, it generates 6 Electro Quivers.
Basic Attack: Cloud Piercer - Drift
During Basic Attack: Cloud Piercer, drag the Move and press Basic to activate:
Shoot a ranged piercing attack and reposition towards the corresponding drag direction, dealing Physical DMG.
Basic Attack: Falling Feather
After the 5th hit of Basic Attack: Cloud Piercer, a Special Attack, an EX Special Attack, or a Chain Attack, hold Special to activate:
Immediately shoot Falling Feather at enemies ahead, dealing Electric DMG.
Hold Basic to aim at a target and release Basic to activate:
After drawing the bowstring and aiming, shoot Falling Feather at the target, dealing Electric DMG.
Basic Attack: Ha-Oto no Ya
When the 5th hit of Basic Attack: Cloud Piercer/EX Special Attack/Chain Attack hits an enemy or the ground, it can generate 2/6/6 Electro Quivers. If there are no Electro Quivers on the field when any squad member applies an Attribute Anomaly to an enemy, generate 6 Electro Quivers. This effect can trigger once every 12s.
There can be up to 6 Electro Quivers present at a time. If there are any Electro Quivers present when Harumasa fires and hits enemies with Falling Feather, the Electro Quivers will activate and fire Ha-Oto no Ya at the enemies hit by Falling Feather, dealing Electric DMG.
Ha-Oto no Ya will apply Electro Prison to enemies hit, stacking up to 8 times and lasting 10s, repeated triggers reset the duration. While a target has at least 2 stacks of Electro Prison, they will be X-Marked.
Dodge: Quick Flash
Press Dodge to activate:
A quick dash dodge.
Character is invulnerable while using this skill.
Dash Attack: Hiten no Tsuru
Press Basic during a dodge to activate:
Launch multiple piercing attacks ahead, dealing Physical DMG.
Dodge Counter: Hidden Edge
Press Basic during a Perfect Dodge to activate:
Pierces enemies in front, dealing Electric DMG.
Character is invulnerable while using this skill.
Dash Attack: Hiten no Tsuru - Slash
While there are X-Marked enemies on the field, Harumasa will enter the Awakened state, switching Dash Attack: Hiten no Tsuru for Dash Attack: Hiten no Tsuru - Slash.
While in the Awakened state, press Basic during a dodge to activate:
Rush forwards to the closest X-Marked enemy and execute a powerful slash, dealing Electric DMG.
When the slash hits the target, it consumes 2 stacks of Electro Prison. With less than 2 stacks of Electro Prison, X-Marked will be removed from the enemy. Before X-Marked is removed, repeatedly press Basic to repeatedly use Dash Attack: Hiten no Tsuru - Slash. While no X-Marked enemies exist on the field, Harumasa leaves the Awakened state.
While in the Awakened state, press Basic after Basic Attack: Falling Feather to quickly follow up with Dash Attack: Hiten no Tsuru - Slash.
During skill activation, Anti-Interrupt level increases, and DMG taken is reduced by 40%.
[Awakened Potential]
While there are X-Marked enemies on the field, Harumasa will enter the Awakened state, switching Dash Attack: Hiten no Tsuru for Dash Attack: Hiten no Tsuru - Slash.
While in the Awakened state, press Basic to activate:
Rush forward to the closest X-Marked enemy and execute a powerful slash, dealing Electric DMG. Hitting a Stunned enemy triggers Chasing Thunder, dealing 1 instance of additional Electric DMG.
When the slash hits the target, it consumes 2 stacks of Electro Prison. With less than 2 stacks of Electro Prison, X-Marked will be removed from the enemy. Before X-Marked is removed, repeatedly press Basic to repeatedly use Dash Attack: Hiten no Tsuru - Slash. While no X-Marked enemies exist on the field, Harumasa leaves the Awakened state.
While in the Awakened state, press Basic to after Basic Attack: Falling Feather to quickly follow up with Dash Attack: Hiten no Tsuru - Slash.
Enemy attacks can be blocked during the 1st hit of the skill. The pursuit effect of the second and third hits is increased.
During skill activation, Anti-Interrupt level increases, and DMG taken is reduced by 40%.
Quick Assist: Braced Bow
When the on-field character is launched, press Switch to activate:
Unleash a piercing attack at enemies ahead, dealing Electric DMG.
Character is invulnerable while using this skill.
Defensive Assist: Yugamae
When the on-field character is about to be attacked, press Switch to activate:
Parries the enemy's attack, dealing massive Daze.
Character is invulnerable while using this skill.
Assist Follow-Up: Yugamae - Slash
Press Basic after a Defensive Assist to activate:
Unleash a series of slashes at enemies ahead, dealing Electric DMG.
Character is invulnerable while using this skill.
Special Attack: Nowhere to Hide
Press Special to activate:
Launch an arrow forward, dealing Electric DMG.
Anti-Interrupt level is increased while using this skill.
EX Special Attack: Nowhere to Run
With enough Energy, press EX to activate:
Launch daggers and an enhanced arrow ahead, dealing massive Electric DMG.
When the enhanced arrow hits an enemy or the ground, it generates 6 Electro Quivers.
Character is invulnerable while using this skill.
EX Special Attack: Nowhere to Run - Patrol
[Skill unlocked after Awakening Potential]
With enough energy, press EX after using the 4th/5th attack of Basic Attack: Cloud Piercer, Dash Attack: Hiten no Tsuru - Slash, an Ultimate, Dodge Counter: Hidden Edge, or Quick Assist: Braced Bow to activate:
Fire enhanced arrows forward in rapid succession, dealing massive Electric DMG.
When the first enhanced arrow hits an enemy or the ground, 6 Electro Quivers are generated. When the final enhanced arrow hits an enemy, it activates the Electro Quivers on the field, firing Ha-Oto no Ya at the target, dealing Electric DMG.
When the target's Electro Prison stacks are close to the maximum, fewer Electro Quivers will be activated.
Character is invulnerable while using this skill.
Chain Attack: Kai - Hanare
When a Chain Attack is triggered, select the character to activate:
Unleash a piercing attack on enemies in a large area ahead then fire an enhanced arrow, dealing massive Electric DMG.
When the arrow hits the ground, it generates 6 Electro Quivers.
Character is invulnerable while using this skill.
Ultimate: Zanshin
When Decibel Rating is at Maximum, press Ultimate to activate:
Unleash a piercing attack on enemies in a large area ahead, dealing massive Electric DMG.
Character is invulnerable while using this skill.
Zanshin - Scattered Blossoms
[Skill unlocked after Awakening Potential]
Activates ALT Automatically after Ultimate:
Unleashes a wide-area piercing attack against enemies in front, dealing Electric DMG. This is considered Ultimate DMG.
Character is invulnerable while using this skill.
Core Passive: Day Break
The CRIT Rate of Dash Attack: Hiten no Tsuru - Slash increases by 10.6%, and when Harumasa's Dash Attack: Hiten no Tsuru - Slash triggers a critical hit against an enemy, he gains 1 stack of Gleaming Edge, for up to a maximum of 3 stacks per use of the skill and stacking up to 6 times, lasting 5s, repeated triggers reset the duration. Each stack of Gleaming Edge increases the CRIT DMG of Dash Attack: Hiten no Tsuru - Slash by 6%.
[Awakened Potential]
The CRIT Rate of Dash Attack: Hiten no Tsuru - Slash, Chasing Thunder, and Ultimate increase by 10.6%. When Harumasa's Dash Attack: Hiten no Tsuru - Slash/Ultimate triggers a critical hit against an enemy, he gains 1/6 stacks of Gleaming Edge. Dash Attack: Hiten no Tsuru - Slash can grant a maximum of 3 stacks per activation, and Gleaming Edge can stack up to 6 times, lasting 5s. Repeated triggers reset the duration. Each stack of Gleaming Edge increases the CRIT DMG of Dash Attack: Hiten no Tsuru - Slash, Chasing Thunder, and Ultimate by 6%.
*Stats shown are at Base level.
Additional Ability: Overclock
When another character in your squad is a Stun or Anomaly character:
When Harumasa's attacks hit Stunned enemies or enemies under Attribute Anomaly, his DMG increases by 40%. When Harumasa's Falling Feather hits Stunned enemies or enemies under Attribute Anomaly, it will apply 2 stacks of Electro Prison to the target.
Potential Awakening: Focus
When activating an EX Special Attack, Chain Attack, or Ultimate, increases ATK by 4%.
Dash Attack: Hiten no Tsuru - Slash and Chasing Thunder ignore 5% of the target's Electric RES for 12s. Repeated triggers reset the duration.
Extends the duration of Core Passive's Gleaming Edge to 10s.
*Stats shown are at Base level.
Mindscape Cinema
Which Mindscapes Are Worth It?
M1 is the most valuable: it raises the Electro Prison cap so Harumasa gets more Slashes and wastes fewer quivers. M6 is a massive damage boost through Ha-Oto no Ya, and M4 lets him use his Ultimate more often. M3 and M5 only add skill levels and are not counted.
- M1Electro Prison's cap rises to 14 stacks and each quiver fires 2 Ha-Oto no Ya in a row, so every mark yields more Slashes and quivers are rarely wasted.
- M2Chain Attacks and Ultimates grant 7 stacks that raise Slash DMG by 50%, one consumed per Slash: a good boost, but it only covers part of his combo.
- M4Electro Prison lasts 20s, each Slash grants extra Decibels, and his Ultimate applies maximum Electro Prison to every enemy on the field: more frequent Ultimates and much better multi-target damage.
- M6Ha-Oto no Ya hitting Stunned or Anomaly-afflicted enemies lets him ignore 15% Electric RES, and every 12 hits trigger an electromagnetic explosion for 1,500% ATK, a huge damage increase.
 M1
M1"High Spirit"Recommended
The maximum stack limit of Electro Prison from Basic Attack: Ha-Oto no Ya increases to 14 stacks.
When an Electro Quiver is triggered, 2 consecutive Ha-Oto no Ya will be fired at the target.
"I'm not like some stubborn idiots who insist on facing the enemy head-on."
"Be it a straightforward assault or an underhanded attack from the shadows, anything that gets me off work earlier is good in my eyes~"
 M2
M2LanguishRecommended
When using an Chain Attack or Ultimate, Harumasa gains 7 stacks of Electro Blitz, up to a max of 7 stacks.
While possessing Electro Blitz, the DMG of Dash Attack: Hiten no Tsuru - Slash increases by 50%.
Consume 1 stack of Electro Blitz once Dash Attack: Hiten no Tsuru - Slash ends.
"Don't look at me like that, I'm actually real frail, y'know~"
Harumasa lazily sprawls across his office desk.
"So... how 'bout picking someone else for this mission?"
 M3
M3White Lies
Basic Attack, Dodge, Assist, Special Attack, and Chain Attack Lv. +2
"...Don't worry, this isn't enough to kill me."
He wipes the blood from the corner of his mouth with a smile and readies his bow once more.
"After all, I'm going to live to make it everyone's problem."
 M4
M4Occasionally MotivatedRecommended
Electro Prison now lasts for 20s. When Dash Attack: Hiten no Tsuru - Slash hits enemies, Harumasa gains 30 Decibels once per use of this skill.
Upon activating an Ultimate, apply the maximum stacks of Electro Prison to all on-field enemies.
Harumasa is occasionally full of energy and motivation...
When there's only five minutes left until he can get off work.
 M5
M5No One Knows
Basic Attack, Dodge, Assist, Special Attack, and Chain Attack Lv. +2
"I want vacations, freedom, to be happy every day!"
"Just kidding. I want to live."
 M6
M6Tacit UnderstandingRecommended
After Ha-Oto no Ya hits Stunned enemies or enemies under Attribute Anomalies, Harumasa will ignore 15% of the target's Electric RES for 12s.
Every 12 times an enemy is hit by Ha-Oto no Ya, trigger an extra electromagnetic explosion, dealing 1,500% of Harumasa's ATK to the target as Electric DMG.
"My master taught me a lot of things, like how to draw a bow, how to wield a blade, and how to survive in this world with this body of mine."
"...What happened after that?"
"Well, after that... he left me."
Base Stats
Stats at Lv.60
- HP
- 7405
- ATK
- 840
- DEF
- 600
- Impact
- 90
- CRIT Rate
- 5%
- CRIT DMG
- 50%
- Anomaly Proficiency
- 80
- Anomaly Mastery
- 95
- PEN Ratio
- 0%
- Energy Regen
- 1.2
Stats by level
Profile
- Faction
- Hollow Special Operations Section 6
- Gender
- Male
- Height
- 173 cm
- Birthday
- July 19th
- Release version
- 1.4
- Signature W-Engine
- Zanshin Herb Case
- Voice actors (English)
- Micah Solusod
- Voice actors (Chinese)
- 徐翔 (Xu Xiang)
- Voice actors (Japanese)
- 柿原徹也 (Kakihara Tetsuya)
- Voice actors (Korean)
- 정의택 (Jung Ui-taek)
"Nice to meet you, unless you're here to make me work overtime."
"Ahem... I feel like my condition has worsened..."
"I've got bags under my eyes, my body aches all over, and I feel so out of it that I’m about to mutate into an Ethereal."
"Deputy, are you not going to give me a sick leave note?"
Story
Agent Profile: Asaba Harumasa
Asaba Harumasa, a member of Hollow Special Operations Section 6.
Possessing exceptional Ether aptitude since he was young and being dubbed a prodigy, he entered HSO after graduating with outstanding merit.
Was originally a member of a certain ace division within HSO, but later left due to various reasons, joining Miyabi's team instead.
He possesses a carefree and laidback attitude, and his only wish is to achieve acceptable results with minimum effort.
After efficiently taking care of his work to the lowest acceptable standard, he will hurry to use all the remainder of his available time to rest (slack off).
He claims he uses a bow to better slack off, as it effectively lowers the amount of running he has to do.
Asaba Harumasa has poor health, and over-exercise sometimes triggers his illness.
He often uses this reason to apply for sick leave, though no one knows what he does with this time off. Either way, it's probably not resting.
Increase Trust to Close to unlock more
Asaba Harumasa has a very rare illness, Ether Aptitude Regression Syndrome.
This illness causes certain parts of the patient's body to mutate, wrecking their constitution, but also giving them unusually exceptional Ether aptitude.
In the late stages of the illness, the patient's body will rapidly deteriorate, losing their Ether aptitude and sensory functions while under immense pain, eventually resulting in death. If the patient's illness worsens in late stages while in a Hollow, they'll quickly be corrupted into an Ethereal.
Those who suffer from Ether Aptitude Regression Syndrome do not live long. Currently, the longest-lived person with this illness died at the age of 26.
There is no known method to completely cure this disease.
Cooperation Notes:
Belle
Harumasa sure is good at slacking off… Hey Wise, maybe we should learn from him.
Wise
Harumasa can only slack off because he manages to complete his work with efficiency.
Let's try mastering that skill first…
Ghi Chú Hợp Tác
Belle
Harumasa thật có tài trong chuyện lười biếng trốn việc... Anh, hay chúng ta cũng học hỏi đi?
Wise
Tiền đề của việc Harumasa trốn việc là anh ấy có thể hoàn thành công việc cơ bản với hiệu suất cao. Chúng ta vẫn nên bắt đầu học từ điểm này thì hơn...
Thông Tin Thích Nghi
Theo thông tin liên quan ghi chép:
Chỉ huy Asaba Harumasa có khả năng thích ứng Ether tốt, cho phép thực hiện các công việc cơ bản như điều tra và khai thác trong Lỗ Hổng đã biết trong thành phố (bao gồm Lỗ Hổng Phát Sinh).
Nếu muốn biết thêm thông tin chi tiết, góp ý nên điều động quyền hạn mở khóa báo cáo bệnh án của Asaba Harumasa.
Official Videos
 ▶
▶Featured Audition | Asaba Harumasa
 ▶
▶For Display Only | Asaba Harumasa
 ▶
▶Plastic-Wrapped Journal | Built for Bitterness
 ▶
▶Asaba Harumasa EP - "Picture Book" | Zenless Zone Zero
 ▶
▶Exclusive Channel: Per Aspera Now Open
 ▶
▶Asaba Harumasa Character Demo - "When the Crows Perch" | Zenless Zone Zero
 ▶
▶Agent Combat Intel: Asaba Harumasa | Zenless Zone Zero
 ▶
▶#MerryChristmas
 ▶
▶Everyday Scenes - "No Entry..." | Zenless Zone Zero